※ Posting 방법과 필요한 문법, 기능들
GitHub Pages에 포스트를 등록하는 방법과 포스트 작성에 필요한 markdown문법, HTML 태그, 테마에서 제공하는 기능들
포스트 등록
GitHub Pages에서 포스트는 markdown 파일로 생성해야 한다. /_posts/ 안의 원하는 카테고리의 폴더를 만들고 거기에 YEAR-MONTH-DAY-title.md 형식으로 파일을 생성하면 된다.
나는 etc 카테고리의 Hello World라는 포스트를 생성하고 싶으므로 /_posts/etc/에 2023-01-01-hello-world.md를 생성했다.
markdown 파일을 생성했으면 markdown 파일 맨 위에서 포스트의 제목, 설명, 게시 날짜, 카테고리 등을 설정해주는 YML을 설정해야 한다. 아래와 같이 설정하면 된다.
2023-01-01-hello-world.md
---
title: Hello World
excerpt: Jekyll을 이용하여 GitHub Pages 블로그를 시작한다.

categories:
  - etc
tag:
  - null

date: 2023-01-01T06:28:08.877Z
last_modified_at: 2023-01-20T11:55:09.660Z
---
날짜 같은 경우는 vs code의 front matter플러그인을 사용하면 자동으로 현재 날짜를 입력할 수 있다.
--- 밑에 원하는 내용을 markdown 문법으로 쓰면서 포스팅하면 된다.
이렇게 markdown 파일을 생성하고 push하면 포스트가 업로드 된다.
포스팅 하는 데 필요한 markdown 문법들,
그리고 markdown에서 지원하지 않는 요소를 추가하기 위한 HTML 요소 추가와 Minimal Mistakes 테마에서 제공하는 기능 추가를 정리
markdown과 HTML의 구분과 분류가 틀릴 수도 있음
Markdown Syntax
1. Headers 헤더
#으로 시작하는 텍스트.#은 하나부터 여섯 개까지 가능.#이 늘어날 때마다 제목의 스케일 낮아짐.- H1은
===로도 만들 수 있음. - H2는
--로도 만들 수 있음.
Syntax 마크다운 사용법
This is an H1
===
This is an H2
---
# This is an H1
## This is an H2
### This is an H3
#### This is an H4
##### This is an H5
###### This is an H6
Demonstration 실행결과
This is an H1
This is an H2
This is an H1; 부(parts)에 사용
This is an H2; 장(chapters)에 사용
This is an H3; 페이지 섹션에 사용
This is an H4; 하위 섹션에 사용
This is an H5; 하위 섹션 아래의 하위 섹션에 사용
This is an H6; 문단에 사용
2. Emphasis 강조
- 기울여 쓰기(italic) :
*또는_로 감싼 텍스트. - 두껍게 쓰기(bold) :
**또는__로 감싼 텍스트. - 취소선 :
~~로 감싼 텍스트. - 이탤릭체와 볼드를 같이 사용할 수 있음.
Syntax 마크다운 사용법
  *This text will be italic*
  _This will also be italic_
  **This text will be bold**
  __This will also be bold__
  ~~This is canceled~~
  *You **can** combine them*
Demonstration 실행결과
This text will be italic
This will also be italic
This text will be bold
This will also be bold
This is canceled
You can combine them
3. Blockquotes 인용
>으로 시작하는 텍스트.>는 3개까지 가능.1개는 인용문.2개는 인용문 안에 인용문.3개는 인용문 안에 인용문 안에 인용문.- 인용문 안에서는 코드블럭, 표 안됨.
Syntax 마크다운 사용법
As Grace Hopper said:
> I’ve always been more interested in the future than in the past.
> This is a first blockquote.
> > This is a second blockquote.
> > > This is a third blockquote.
Demonstration 실행결과
As Grace Hopper said:
I’ve always been more interested in the future than in the past. This is a first blockquote.
This is a second blockquote.
This is a third blockquote.
4. Lists 목록
4.1. Unordered lists 순서가 없는 목록
*,+,-를 이용해서 순서가 없는 목록을 만들 수 있음.- 들여쓰기를 하면 모양이 바뀜.
4.2. Ordered lists 순서가 있는 목록
- 숫자를 기입하면 순서가 있는 목록이 됨
- 들여쓰기를 하면 모양이 바뀜
Syntax 마크다운 사용법
* Item 1
* Item 2
  * Item 1
  * Item 2
    * Item 1
    * Item 2
 1. Item 1
 2. Item 2
 3. Item 3
   1. Item 1
   2. Item 2
   3. Item 3
     1. Item 1
     2. Item 2
     3. Item 3
Demonstration 실행결과
- Item 1
- Item 2
- Item 1
- Item 2
- Item 1
- Item 2
- Item 1
- Item 2
- Item 3
- Item 1
- Item 2
- Item 3
- Item 1
- Item 2
- Item 3
5. Backslash Escapes 백슬래쉬 이스케이프
- 특수문자를 표현할 때, 표시될 문자 앞에
\를 넣고 특수문자를 쓰면 됨. - 주의할 점은 앞과 뒤에가 형식이 똑같이 백슬래쉬 뒤에 특수문자임. 감싸는 형태가 아님을 주의
- 백슬래쉬는 아래의 특수문자를 표현할 수 있음.
- \ backslash, \ backtick, * asterisk, _ underscore, {} curly braces, [] square brackets, () parentheses, # hash mark, + plus sign, - minus sign (hyphen), . dot, ! exclamation mark
Syntax 마크다운 사용법
\*literal asterisks\*
\#hash mark\#
\[squre brackets\]
Demonstration 실행결과
*literal asterisks*
#hash mark#
[squre brackets]
6. Images 이미지
- <img>로 변환됨
- 링크와 비슷하지만 앞에
!가 붙음. - 인라인 이미지
 - 링크 이미지
 - 이미지의 사이즈를 변경하기 위해서는
<img width="OOOpx" height="OOOpx"></img>와 같이 표현. - 그림에 링크를 걸려면
](이동하려는 링크 주소)로 하면 됨.
Syntax 마크다운 사용법


Demonstration 실행결과
7. Links (Anchor) 링크
7.1. External Links 외부 링크
인라인 링크: [링크](<http://example.com> "링크 제목")
			[링크](http://example.com)
url 링크: <example.com>, <example@example.com>; (github의 md에서는 꺽쇠 괄호 없어도 자동으로 링크를 사용, GitHub Pages에서는 안 될 때도 있음)
링크 끝에 ;달면 안됨
Syntax 마크다운 사용법
[Google](<http://www.google.com> "구글")
[Google](https://www.google.com)
[Naver](<http://www.naver.com> "네이버")
[Github](<http://www.github.com> "깃허브")
구글 www.google.com; 꺽쇠없음
네이버 <www.naver.com>; 꺽쇠있음
My mail <chs902m@gmail.com>
Demonstration 실행결과
Google
Google
Naver
Github
구글 www.google.com
네이버 <www.naver.com>
My mail chs902m@gmail.com
7.2. Internal Links 내부 링크
[보여지는 내용](#이동할 헤드(제목))
괄호 안의 링크를 쓸 때는 띄어쓰기는 -로 연결, 영어는 모두 소문자로 작성
#다음에 공백이 있으면 안됨.
특수문자 다 빼야함.
Syntax 마크다운 사용법
[1. Headers 헤더](#1-headers-헤더)
[2. Emphasis 강조](#2-emphasis-강조)
[3. Blockquotes 인용](#3-blockquotes-인용)
Demonstration 실행결과
1. Headers 헤더
2. Emphasis 강조
3. Blockquotes 인용
8. Fenced Code Blocks 코드 블럭
- 간단한 인라인 코드는 텍스트를 앞뒤로
\기호로 감싸면 됨. \`\`\`혹은~~~코드.- 첫 줄과 마지막 줄에 Back quote (
\) 또는 물결(~) 3개 삽입. - 코드가 여러 줄인 경우, 줄 앞에 공백 네 칸을 추가하면 됨. (밑에 Syntax 마크다운 사용법에서 모든 줄 앞에 공백이 네 칸 있음)
\`\`\`옆에 언어를 지정해주면 syntax color가 적용됨.
Syntax 마크다운 사용법
```
This is code blocks.
```
~~~
This is code blocks.
~~~
	4 spaces
```javascript
function test() {
 console.log("look ma’, no spaces");
}
```
Demonstration 실행결과
This is code blocks.
This is code blocks.
4 spaces ```javascript function test() { console.log("look ma’, no spaces"); } ```
9. Task Lisk 체크 리스트
- 줄 앞에
[x]를 써서 완료된 리스트 표시. - 줄 앞에
[ ]를 써서 미완료된 리스트 표시. - 체크 안에서 강조 외에 여러 기능을 사용할 수 있음.
Syntax 마크다운 사용법
-   [x] this is a complete item
-   [ ] this is an incomplete item
-   [x] @mentions, #refs, links, **formatting**, and <del>tags</del> supported
-   [x] list syntax required (any unordered or ordered list supported)
Demonstration 실행결과
- this is a complete item
- this is an incomplete item
- @mentions, #refs, links,
formatting, and
tagssupported - list syntax required (any unordered or ordered list supported)
10. Horizontal Rules 수평선
- - 또는 * 또는 _ 을 3개 이상 작성.
- 단, -을 사용할 경우 header로 인식할 수 있으니 이 전 라인은 비워두어야 함.
Syntax 마크다운 사용법
* * *
***
*****
- - -
-------------------
Demonstration 실행결과
11. Emoji 이모티콘
- 마크다운을 이용해 이모티콘을 표현가능.
- 깃허브도 적용가능.
- 더 많은 리스트는 아래의 사이트로 방문.
- www.emoji-cheat-sheet.com
Syntax 마크다운 사용법
GitHub supports emoji! :+1: :sparkles: :camel: :tada: :rocket: :metal: :octocat:
Demonstration 실행결과
GitHub supports emoji! :+1: :sparkles: :camel: :tada: :rocket: :metal: :octocat:
12. Table 테이블
- 헤더와 셀을 구분할 때 3개 이상의 ``(hyphen/dash) 기호가 필요함.
- 헤더 셀을 구분하면서 :(Colons) 기호로 셀(열/칸) 안에 내용을 정렬할 수 있음.
- 가장 좌측과 가장 우측에 있는 |(vertical bar) 기호는 생략 가능.
Syntax 마크다운 사용법
테이블 생성

헤더1|헤더2|헤더3|헤더4
---|---|---|---
셀1|셀2|셀3|셀4
셀5|셀6|셀7|셀8
셀9|셀10|셀11|셀12

테이블 정렬

헤더1|헤더2|헤더3
:---|:---:|---:
Left|Center|Right
1|2|3
4|5|6
7|8|9
Demonstration 실행결과
테이블 생성
| 헤더1 | 헤더2 | 헤더3 | 헤더4 |
|---|---|---|---|
| 셀1 | 셀2 | 셀3 | 셀4 |
| 셀5 | 셀6 | 셀7 | 셀8 |
| 셀9 | 셀10 | 셀11 | 셀12 |
테이블 정렬
| 헤더1 | 헤더2 | 헤더3 |
|---|---|---|
| Left | Center | Right |
| 1 | 2 | 3 |
| 4 | 5 | 6 |
| 7 | 8 | 9 |
13. Line Breaks 줄바꿈 (HTML 태그)
<br>를 활용해서 줄바꿈을 할 수 있음. (<br>안하고CR한 번만 하면 변화 없음.)공백두 번 +CR도 가능CR을 두 번하면 줄 사이에 공백이 생기고<br>만 하면 줄 사이에 공백이 안 생김.CR두 번 대신에<br>두 번해도 줄 사이에 공백을 만들 수 있음.<br>대신<br/>도 가능
Syntax 마크다운 사용법
Oh my my my oh my my my You got me high so fast <br>
네 전부를 함께하고 싶어 Oh my my my oh my my my <br>
You got me fly so fast 이제 조금은 나 알겠어 <br>
Demonstration 실행결과
Oh my my my oh my my my
You got me high so fast
네 전부를 함께하고 싶어
Oh my my my oh my my my
You got me fly so fast
이제 조금은 나 알겠어
14. Reference 참고 링크
HTML 태그
링크
링크 새 창에 띄우기
<a href="링크" target="_blank" rel="noreferrer noopener">본문에 나타날 말</a>
<a href="https://www.w3schools.com/tags/ref_colornames.asp" target="_blank" rel="noreferrer noopener">HTML Color Names</a>
링크 스타일 변경
<a href="링크" style="스타일">본문에 나타날 말</a>
<h2 class="class"><a href="/blog/" style="text-decoration:none; color:lightcoral">Blog</a></h2>
Blog
이 코드는 헤더도 적용이 된 코드이다.
style을 여러 개 적용하고 싶다면 style="속성:값; 속성2:값"처럼 적용하면 된다.
font를 변경하고 싶다면 font:Hack처럼 폰트만 쓰면 안되고 font: 1em Hack처럼 요소를 하나 더 써줘야한다. font: bold 1.3em Hack 같은 것도 된다.
글자 스타일 변경
밑줄
<u>밑줄 있는 텍스트입니다</u>
밑줄 있는 텍스트입니다
글자색
<span style="color:색깔">본문에 나타날 말</span>
색깔에는 영어로 일반적인 색을 써도 나오고, RGB값이나 HEX를 써도 된다.
#229756
seagreen 25% 포화도 저하
3.73:1
#e64a4a
lightcoral 25% 어둡게 25% 포화도 저하
<span style="color:red">빨간 글자입니다.</span>
<span style="color:#00bf5f">초록색 HEX</span>
결과
빨간 글자입니다.
초록색 HEX
특별한 글자나 여러가지 요소 적용
특별한 글자(링크 등)이나 여러가지 요소(글자의 색깔, 크기 등)을 같이 적용하고 싶다면 아래 코드대로 하면 된다. 이 코드는 html코드인데 Markdown안에 넣으면 적용이 가능하다.
<span style="
font-family: 'GyeonggiTitleM';
font-size: 1.5em;
color: red;
<!--기타 바꾸고 싶은 요소들 여기에 적을 것-->
">
<a href=""></a>
<!--여기에 글자를 적으면 됨-->
</span>
정렬
가운데 정렬
<center>가운데</center>
이미지
이미지 쉽게 삽입하기
이미지에 마우스 우클릭하고 주소 복사가 아닌 이미지 자체를 복사해준다.
-> 아무 Github Repository 에 접속한 후 Issue를 쓰는 창을 연다.
-> 복사한 이미지의 주소를 여기에 붙여 넣으면 마크다운 문법의 이미지 링크가 생긴다. (해당 Isssue는 저장할 필요 없다. 그냥 마크다운 이미지 링크 생성용으로 열어둔 것일 뿐)
이미지 정렬
{: .align-center}을 뒤에 붙여주면 가운데 정렬
{: .align-left}을 뒤에 붙여주면 왼쪽 정렬
{: .align-right}을 뒤에 붙여주면 오른쪽 정렬
이미지 크기 변경
{: width="30px", height="100px"} 이렇게 픽셀로 가로 세로 크기를 직접 지정해줄 수도 있고 {: width="50%", height="50%"} 이렇게 비율로 크기를 지정해줄 수도 있다. 단 100%는 이미지 원본이 아닌 최대의 크기를 100%로 본다.
gif
웹에서 gif 단순 이미지 파일을 복사하면 .png로 복사가 된다. 이미지 주소 복사 로 해야 gif로서 복사가 된다. 이미지 주소 복사를 해준 뒤 ![image]() 소괄호 안에 넣어준다.
Header 관련
Header에 색 입히기
<html>
<head>
  <style>
    h3.class {color:#e64a4a}
  </style>
<h3 class="class">헤더 제목</h3>
</head>
</html>
마크다운 안에서 적용 가능
근데 이러면 toc가 적용이 안 됨
Header 일부분만 HTML 적용하기
<h1 class="class">기본 설정 @ <code>_config.yml</code></h1>
Header를 toc에서 제외시키기
Header 밑에 {: .no_toc }를 추가하면 됨.
코드블럭
<code>문구</code> 이용
`를 이용하지 않고 <code>문구</code>로 코드블럭을 만들 수도 있음.
{% %}, {{ }} 코드 인코딩 오류 방지
아래 예시처럼 {% %}, {{ }}가 들어가는 코드는 앞 뒤에 {% raw %}, {% endraw %}를 달아줘야 인코딩 오류가 나지 않는다.
인코딩 오류가 나는 원인은 Jekyll에서 사용되는 liquid는 {% %}, {{ }} 를 escape 문자로 사용하는데, md문서에 {% %}, {{ }} 가 있는 경우 에러 메시지를 출력하기 때문이다.
아래 코드 앞 뒤에 {% raw %}, {% endraw %}를 달아줬으나 블로그에선 인코딩이 된 후라 보이진 않는다.
{% if post.header.teaser %}
  {% capture teaser %}{{ post.header.teaser }}{% endcapture %}
{% else %}
  {% assign teaser = site.teaser %}
{% endif %}

{% if post.id %}
  {% assign title = post.title | markdownify | remove: "<p>" | remove: "</p>" %}
{% else %}
  {% assign title = post.title %}
{% endif %}


<div class="{{ include.type | default: "list" }}__item">
    <article class="archive-item">
        <div>
            <span style="
            font-family: 'GyeonggiTitleM';
            ">
              <a href="{{ post.url }}">{{post.title}}</a>
            </span>
            <small>
                <i class="fas fa-fw fa-calendar-alt" aria-hidden="true"> </i>{{ post.date | date: " %Y. %m. %d." }}
              {% if site.tag_archive.type and post.tags[0] %}
                # {%- include post__taxonomy.html -%}
              {% endif %}
            </small>
        </div>
      </article>
</div>
Lists 목록
링크 등 특별한 글자를 리스트화 시키고 싶을 때 마크다운의 Lists 목록이 사용이 안될 때 쓰는 방법이다.
<ul>, <li> tag
<ul> 태그는 순서가 없는 목록(unorder list)을 만들 때 사용되며, <ul> 내부에 <li> 요소(list item)를 포함하여 각 항목을 표시한다. 대부분의 브라우저에서 리스트에는 원과 같은 불릿(bullet)이 표현된다.
<html>
    <head>
    </head>
    <body>
       <ul>
           <li>HTML</li>
           <li>CSS</li>
           <li>JAVASCRIPT</li>
           <li>JAVA</li>
           <li>JSP</li>
           <li>ORACLE</li>
       </ul>
    </body>
</html>

<ol>, <li> tag
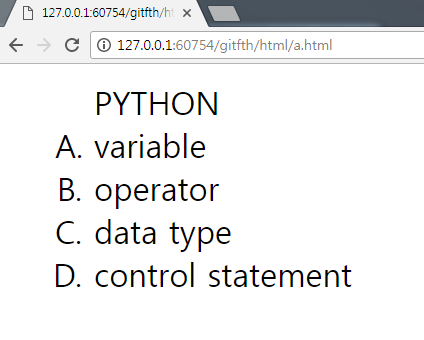
<ol> 태그는 순서 있는 목록을 만들기 위해서 사용되며 <ul>과 같이 내부에 <li>를 포함한다. 대부분의 브라우저에는 리스트가 숫자(기본값)로 표현되며 속성을 지정하여 변경이 가능하다. <ol>에는 type, start, reserved와 같은 속성을 사용할 수 있으며 속성에 대한 내용은 아래와 같다.
| 속 성 | 내 용 |
|---|---|
| type | 목록에 사용될 마커를 지정 * 속성값 : 1(숫자/기본값), a(영어 소문자), A(영어 대문자), i(로마숫자 소문자), I(로마숫자 대문자) |
| start | 시작 목록의 순번을 지정 * 속성값 : 숫자로 순번을 지정 |
| reserved | 항목을 역순으로 표시 |
<!DOCTYPE>
<html>
    <head>
    </head>
    <body>
       <ol type="A">PYTHON
           <li>variable</li>
           <li>operator</li>
           <li>data type</li>
           <li>control statement</li>
       </ol>
    </body>
</html>
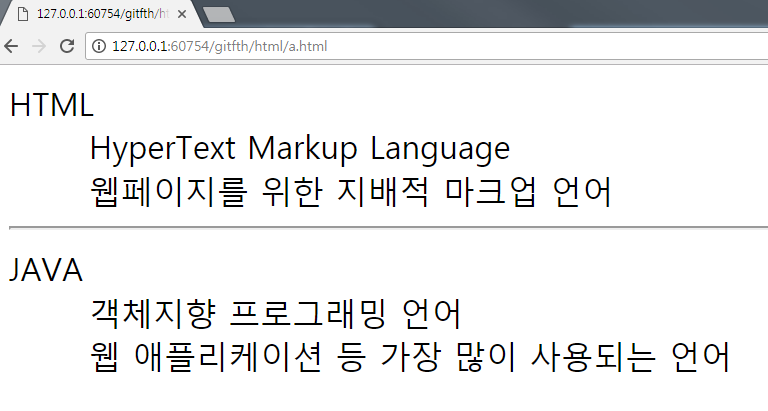
<dl>, <dt>, <dd> tag
<dl>태그는 제목과 설명이 한 쌍인 설명 목록(description list)을 만들 때 사용한다. <dt>와 <dd>와 함께 사용되며, <dt>는 제목을 표시하며 <dd>는 설명(내용)을 표시한다.
<!DOCTYPE>
<html>
    <head>
    </head>
    <body>
       <dl>
           <dt>HTML</dt>
           <dd>HyperText Markup Language</dd>
           <dd>웹페이지를 위한 지배적 마크업 언어</dd>
           <hr />
           <dt>JAVA</dt>
           <dd>객체지향 프로그래밍 언어</dd>
           <dd>웹 애플리케이션 등 가장 많이 사용되는 언어</dd>
       </dl>
    </body>
</html>
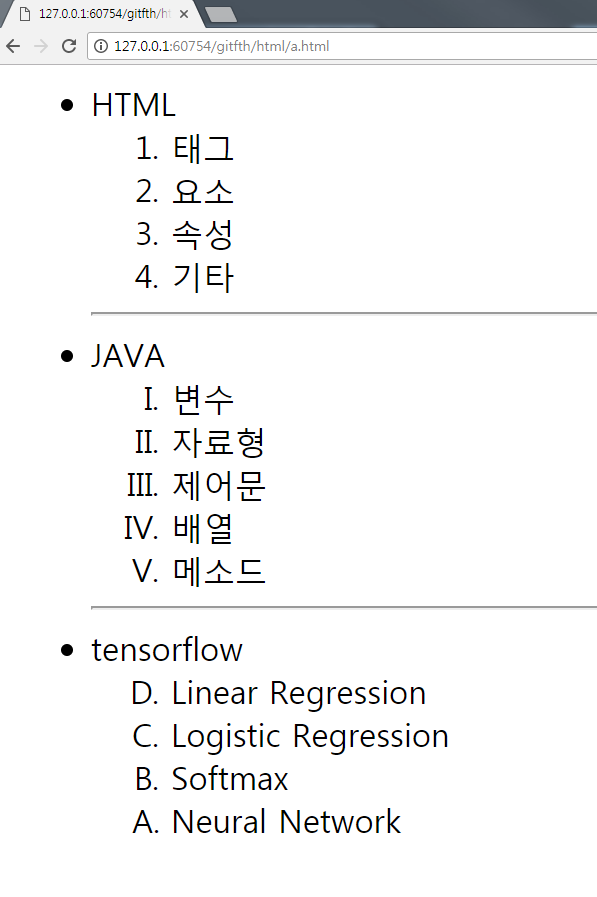
중첩 목록/리스트
다른 태그들과 같이 중첩하여 사용이 가능하다. 즉, <ul> 내에 <ol>을 포함하거나 또 다른 <ul> 등 여러 요소들을 포함하여 사용하는 것이 가능하다.
<!DOCTYPE>
<html>
    <head>
    </head>
    <body>
       <ul>
           <li>HTML
               <ol>
                  <li>태그</li>
                  <li>요소</li>
                  <li>속성</li>
                  <li>기타</li>
               </ol>
           </li>
           <hr />
           <li>JAVA
               <ol type="I">
                  <li>변수</li>
                  <li>자료형</li>
                  <li>제어문</li>
                  <li>배열</li>
                  <li>메소드</li>
               </ol>
           </li>
           <hr />
           <li>tensorflow
               <ol type="A" reversed>
                  <li>Linear Regression</li>
                  <li>Logistic Regression</li>
                  <li>Softmax</li>
                  <li>Neural Network</li>
               </ol>
           </li>
       </ul>
    </body>
</html>
Minimal Mistakes 테마에서 제공하는 기능
인용문
<cite>Steve Jobs</cite> --- Apple Worldwide Developers' Conference, 1997
{: .small}
Steve Jobs — Apple Worldwide Developers’ Conference, 1997
notice
문단의 바로 다음줄에 {: .notice}만 붙여 준다.
notice뒤에 minimal mistakes에서 지정한 notice의 종류 이름을 뒤에 붙여줄 수도 있다. --종류이름
Watch out! This paragraph of text has been emphasized with the {: .notice} class.
Watch out! This paragraph of text has been emphasized with the {: .notice--primary} class.
Watch out! This paragraph of text has been emphasized with the {: .notice--info} class.
Watch out! This paragraph of text has been emphasized with the {: .notice--warning} class.
Watch out! This paragraph of text has been emphasized with the {: .notice--success} class.
Watch out! This paragraph of text has been emphasized with the {: .notice--danger} class.
아래 방법대로 하면 notice안에 코드도 넣을 수 있다.
<div class> HTML 태그를 사용한다. notice 이름의 클래스를 불러온다. markdown="1" 속성은 html코드 속에서 markdown을 인식하게 하기 위한 속성값이다. </div>로 닫아주는 것 잊지 말기
<div class="notice--primary" markdown="1">
안에 `코드`도 넣을 수 있다. 아래처럼!
    ```c++
std::cout << "Hello. World! >> std::endl; // 이걸 들여쓰기하면 코드블럭이 활성화되서 여기선 일부러 안 함
    ```

- C++ 열심히
- 공부하자
</div>
안에 코드도 넣을 수 있다. 아래처럼!
std::cout << "Hello. World! >> std::endl;
- C++ 열심히
- 공부하자
Buttons
Make any link standout more when applying the .btn class.
[Default Button Text](#link){: .btn}
[Primary Button Text](#link){: .btn .btn--primary}
[Success Button Text](#link){: .btn .btn--success}
[Warning Button Text](#link){: .btn .btn--warning}
[Danger Button Text](#link){: .btn .btn--danger}
[Info Button Text](#link){: .btn .btn--info}
[Inverse Button](#link){: .btn .btn--inverse}
[Light Outline Button](#link){: .btn .btn--light-outline}
Default Button Text Primary Button Text Success Button Text Warning Button Text Danger Button Text Info Button Text Inverse Button Light Outline Button
[X-Large Button](#link){: .btn .btn--primary .btn--x-large}
[Large Button](#link){: .btn .btn--primary .btn--large}
[Default Button](#link){: .btn .btn--primary }
[Small Button](#link){: .btn .btn--primary .btn--small}
X-Large Button Large Button Default Button Small Button